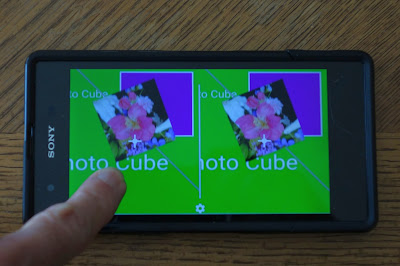
Processing, the programming language, library, and development environment for Artists and Visual Designers can generate Android apps. This feature allows you to see your visual programming creations on an Android phone or tablet. If you have some experience with Android Studio, you might want to use it to develop your Android Processing code instead of Processing's development environment to gain access to a debugger and powerful source editor, etc.
I posted an example Processing Android Sketch project on GitHub that is a starting point you can use for writing processing code using Android Studio.
https://github.com/ajavamind/ProcessingAndroidSketch
Eclipse has been used as an alternative to the Processing development environment and there is a tutorial at
https://processing.org/tutorials/eclipse/ that describes how to do it. There is also a web page for processing-android information that has a paragraph on using Eclipse for Processing Development at:
https://github.com/processing/processing-android/wiki Here I take it a step further and show how to I use Android Studio as an alternate development environment for Processing.
First I created a new blank Activity project in Android Studio. I chose the minimum target API 16, Android 4.1 selection. Next I downloaded a zip file of the Processing-Android libraries from
https://github.com/processing/processing-android
From the unzipped file, processing-android-master.zip, I copied the core source code from the "processing" folder at K:\downloads\processing.org\processing-android-master\core\src to my Android project at C:\Users\Andy\Documents\projects\android\ProcessingSketch\app\src\main\java. I chose to do this instead of creating a separate jar file for Processing-Android so I could study and better understand the internal workings of Processing and tinker with it.
Processing-Android has some data resource files within its java source files. This does not work with Android. The solution is to create an "assets" folder under your project "main". Then add sub folders "processing/opengl" and move the "processing/opengl/shaders" folder with its content into the "opengl" folder you created. I modified all the paths to these shader resources by prefixing path strings with "/assets/" in the PGraphicsOpenGL.java file. Synchronize the project so it will see the folders you changed or added.
For the kinds of sketches I might want to experiment with, I modified the AndroidManifest.xml file by adding the following permissions and features:
<uses-permission android:name="android.permission.NFC" />
<uses-permission android:name="android.permission.READ_EXTERNAL_STORAGE" />
<uses-permission android:name="android.permission.WRITE_EXTERNAL_STORAGE" />
<uses-permission android:name="android.permission.BLUETOOTH"/>
<uses-permission android:name="com.sonymobile.permission.SYSTEM_UI_VISIBILITY_EXTENSIONS"/>
<uses-permission android:name="android.permission.INTERNET" />
<uses-permission android:name="android.permission.VIBRATE" />
<uses-feature android:glEsVersion="0x00020000" android:required="true" />
<uses-sdk android:minSdkVersion="16" android:targetSdkVersion="19"/>
In the MainActivity.java file I modified MainActivity to extend PApplet as follows:
public class MainActivity extends PApplet {
    private static String TAG = "MainActivity";
The import for PApplet package should be added if it was not done automatically.
From MainActivity.java in onCreate(), I also removed setting content view by commenting the line:
//setContentView(R.layout.activity_main);
This change prevents overwriting Processing's content view, otherwise you will not see Processing visuals. Other minor updates making onCreate public were also made.
Now in the MainActivity.java file I added Processing settings(), setup(), and draw() functions. You can only call the size() and fullscreen() functions in settings() , not in setup(). I used size(1920,1080,OPENGL) to match my phones capabilities and called fullscreen();
All these changes become clear in the example I posted on GitHub. The example code draws lines on the screen while you use your finger as a mouse on the screen.
Android Studio is an advanced integrated development environment (IDE), so you get a debugger and source code tools not available in Processing IDE. If you write code with the Processing IDE, you will find this to be a very handy tool to have.


