Candy Cane Ghost for Halloween

Screenshot Finger Drawing
My 101st blog post. Yea!
Here's a screenshot from an experimental paint Android app I am writing. I paint the candy image by dragging my finger across a Samsung Galaxy S6 screen,

Autostereogram 3D Art


Recently I wrote Processing/Java code to construct and experiment with wallpaper styled autostereograms, like the above photo. These are images that appear to be normal 2D, but when you converge your eyes beyond the photo your mind will interpret the image as 3D. You can do this by starting with your eyes close to the image, with everything blurred, and then slowly back off until the pattern begins to float above the background. You can see examples of autostereograms in popular Magic Eye books that present 3D visual puzzles.

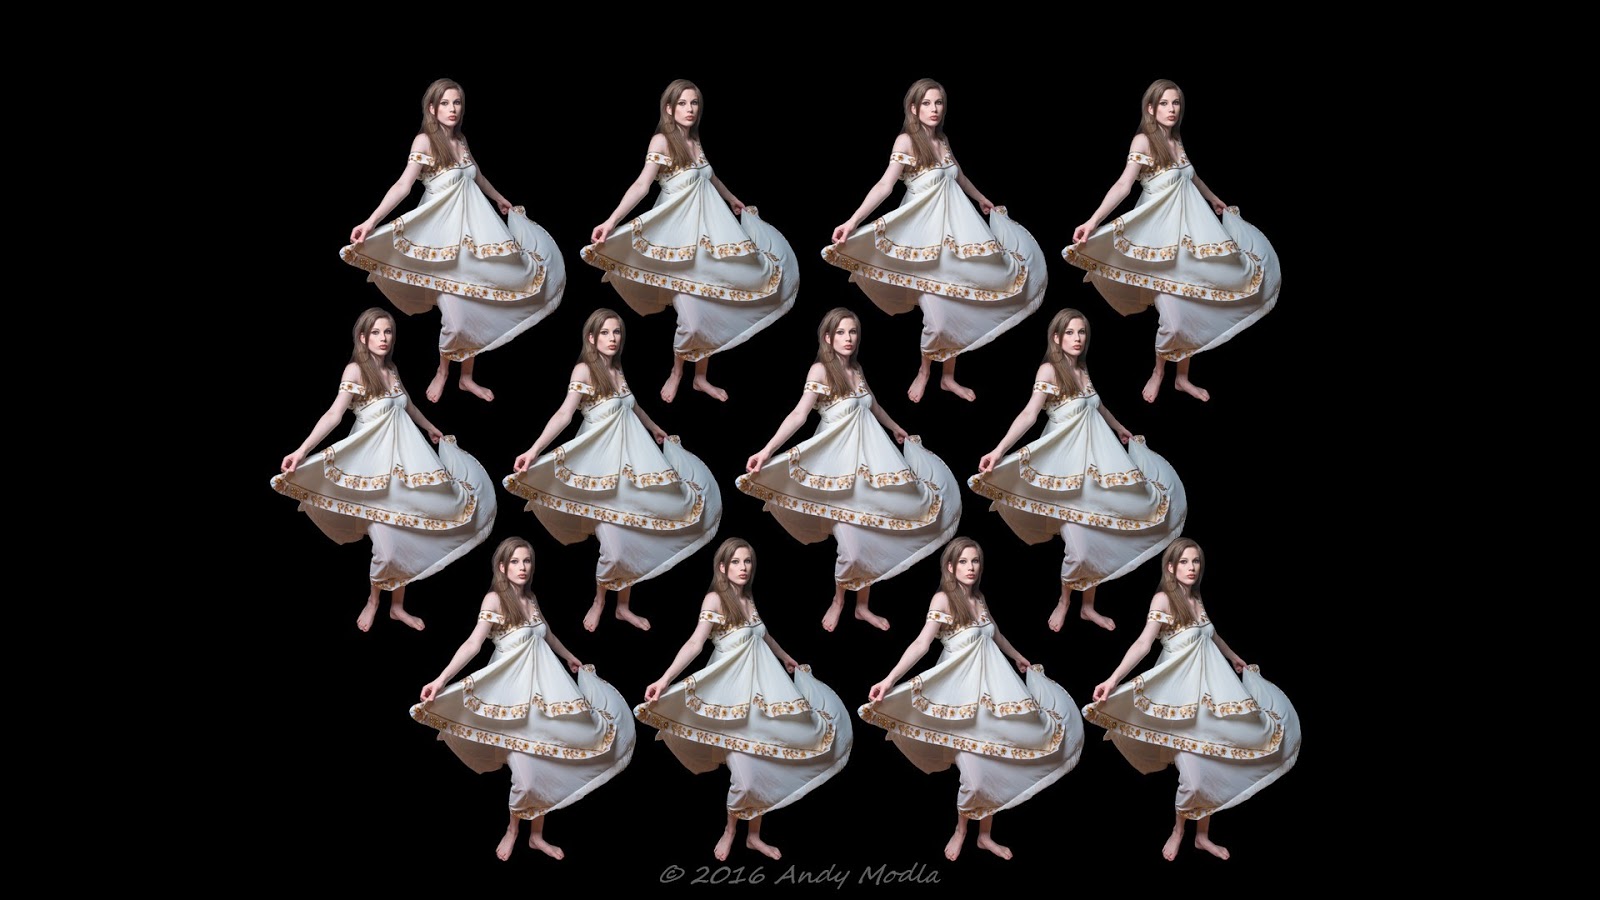
In the first photo above, I experimented with creating a wallpaper pattern that alternates left and right eye cutouts of model Mary Kate from a recent photo shoot. By combining the left and right images together in the wallpaper format I am able to see half of the pattern images as a true floating 3D image and the others as 2D pattern images floating above the background. For a good viewing experience, try to view the photo on a 15 inch diagonal screen display. Viewing on a small 6 inch smartphone display does not produce the best effect.

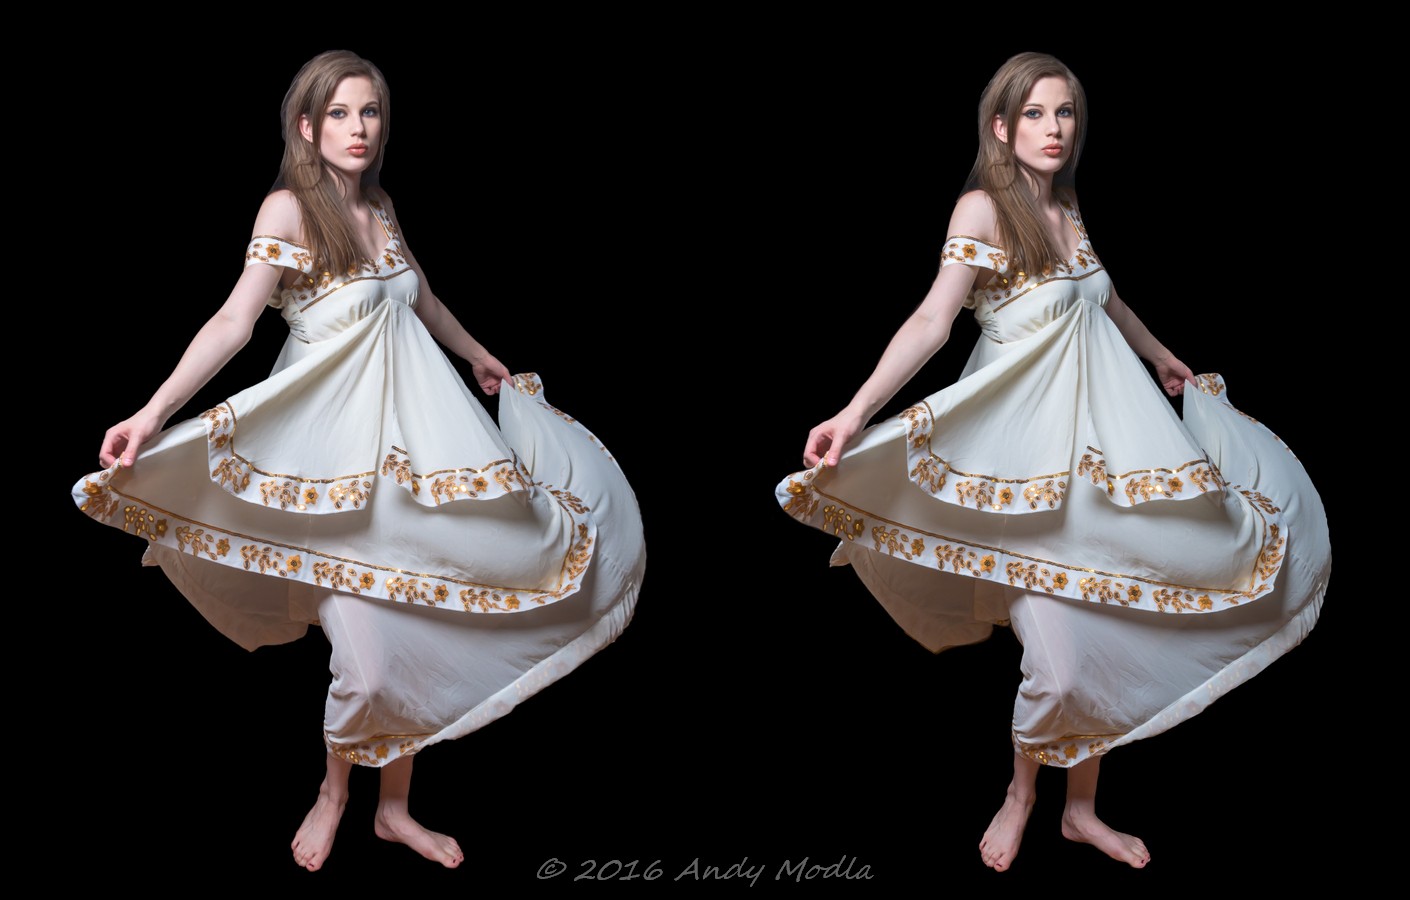
With the above photo you view with the wall-eyed viewing technique. There is another viewing technique named cross-eye. Here are the same cutout photos in right-left order for cross-eyed viewing. Unfortunately I have not yet trained my eyes to view this kind of 3D formatted photo.


Here is the stereo photo in left-right order, so I can see it using a stereoscope and better yet with my 3D/VR Stereo Photo Viewer Android app.


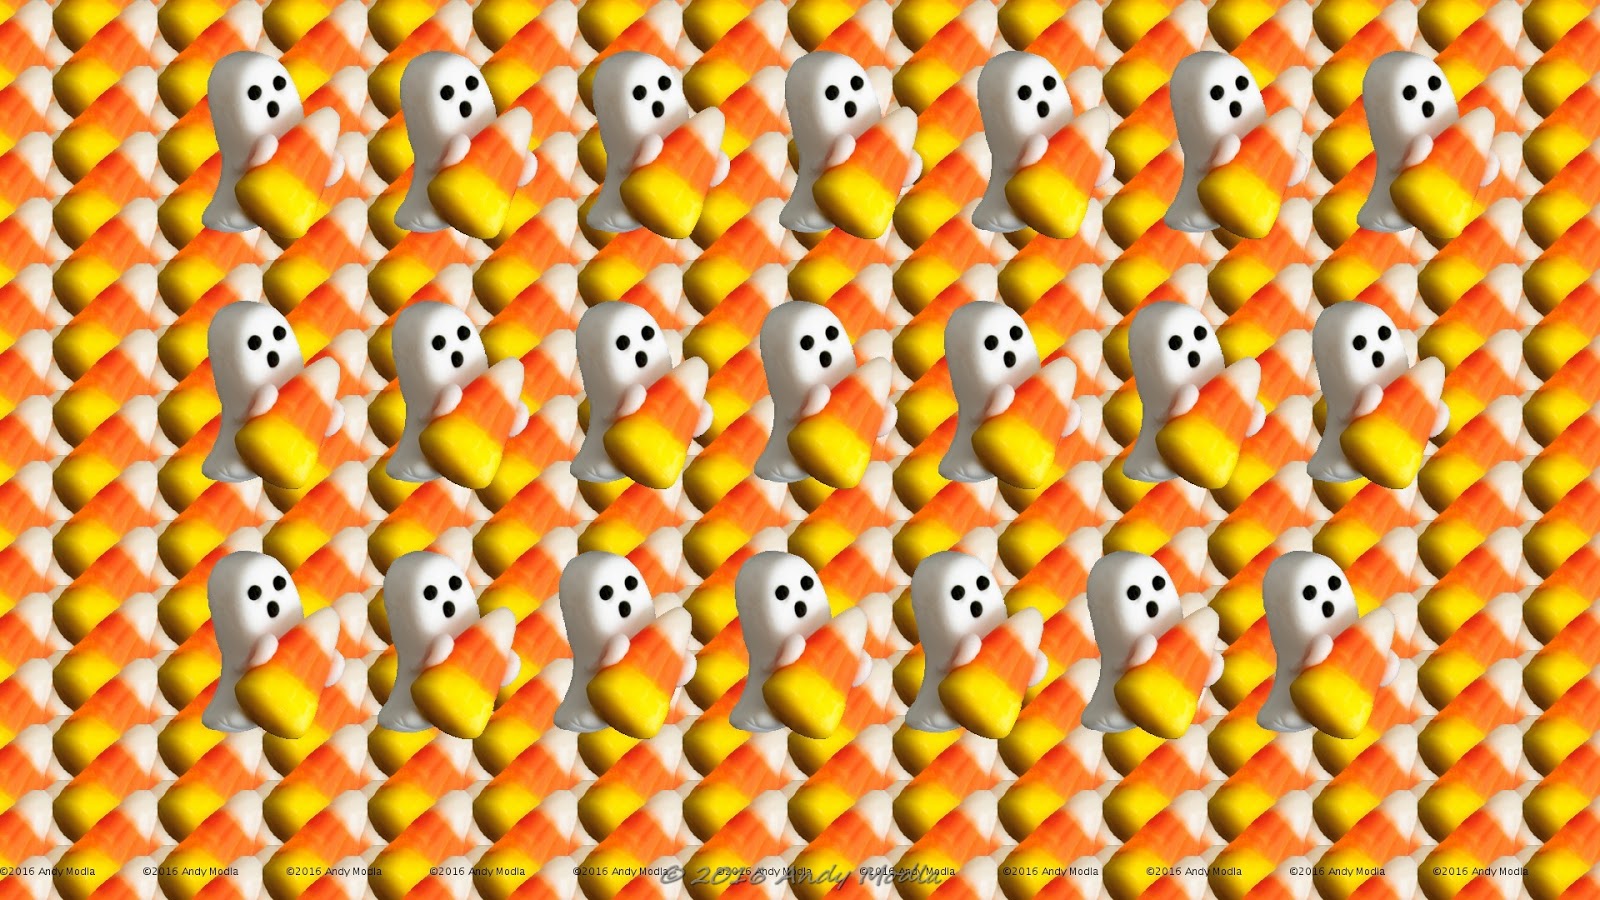
Here are some other wallpaper autostereograms I made where the images float above the background:


All of the images above were constructed from photos I shot and then edited with Lightroom and Photoshop, aligned with Stereo Photo Maker, and finally formatted with the custom Processing code I wrote.

Selecting a Camera for a 3D Twin Camera Rig


UPDATED: 2016-10-11

What features should you look for when selecting a camera to make a 3D twin camera rig? 

I'm asking the question so I can have a checklist for upgrading my current 3D twin camera rig, pictured above, that is more than 3 1/2 years old. It uses two Olympus E-PM2 cameras. The checklist is based on my personal experiences with three home-made twin camera rigs I built and used so far. The other two rigs used Nikon D-80 (purchased 2007) and Canon PowerShot SD800  (purchased 2006, point and shoot) cameras. I bought the Olympus cameras in 2013. Usually I buy the second camera used to lower the cost.

Here are ten features I think you need in a camera to build a twin camera stereo 3D rig:
  1. Live view 
    1. It's too cumbersome to use a viewfinder to compose your shot when using twin cameras.
    2. Capture the "moment" faster because you can see both eye views at the same time when composing a shot.
  2. Touch screen focus point selection (without releasing the shutter)
    1.  Offset twin cameras will not focus on the same subject in your shot, so you need a way to quickly set the same subject focus point for both cameras.
    2. Touching the screen should not release the shutter, the camera menu should have the option to not take the photo when you touch the screen.
  3. Lens not in the center of the camera
    1. Look for lens mount close to one side of the camera
    2. This lens offset makes it possible to give you the smallest inter-axial separation possible for close subjects when one camera is upside down using a Z-bar mount.
  4. Small and lightweight camera
    1. You will carry the rig all day, therefore lighter is better.
    2.  Small cameras usually provide smaller inter-axial separation too.
  5. Interchangeable lenses
    1. You can use a prime lens and not worry if each camera built-in lens has the same zoom setting
    2. Change lens to suit scene and subject
    3. Wide angle lens provide more depth of field than telephoto lenses
  6. Remote focus and shutter trigger connection
    1. Wired
      1. Input remote trigger connector should be on side opposite where two cameras are joined together for the smallest possible inter-axial camera separation.
      2. Use a simple direct wire OR diode circuit to release the shutter without any delays, when the camera is already focused. Diodes isolate the shutter release circuits in each camera. See http://www.rmm3d.com/3d.encyclopedia/twin.camera/sync.html
      3. Note that the focus control line must also have a wire OR diode circuit.
    2. Bluetooth wireless shutter/focus release, if available, allowing you to use two selfie remote Bluetooth triggers wired together.
    3. Optical IR focus/shutter release remote control (Nikon)
    4. WiFi remote focus/shutter trigger control of multiple cameras.
  7. Flash shoe 
    1. Must be able to use off camera flash, no compromises here.
    2. Must be able to select 1st curtain flash trigger for use with an external circuit controller, that allows you to synchronize flash triggers from each camera and use an off camera flash.
  8. One camera may have to be mounted upside down using a Z-bar mount and support
    1. Live view must appear upside, when the camera is upside down.
    2. Menu setting displays you have to make while setting the camera should not appear upside down.
  9. JPEG and Raw photo files
    1. Need Raw files for post processing to adjust left and right camera file exposure and color differences
    2. Post processing produces better photos many times especially to fix noise issues from high ISO settings
  10. Camera with both manual settings and fully automatic settings
    1. Olympus iAuto feature is very helpful when shooting events with many changing brightness levels. Look for a camera with intelligent auto settings.
    2. For some scenes you don't have time to change any camera settings.
    3. Other times you want manual settings for full control, such as a studio setting.
    4. When the light source is off to the side, one of the images will be under exposed when using automatic settings and will need post processing.
My current 3D rig with twin Olympus E-PM2 does everything except 6.2, 6.3, and 8.2. The flash unit in the photo below is about 10 inches above the cameras and is centered for balance. Instead of the flash unit I usually use a PocketWizard wireless controller to trigger off camera strobes.


Dynamic VR vs Static Stereoscope


Your great-great-great grandparent's static image display stereoscope needs an update.

With an Android smartphone app you can view 3D photos dynamically in a Google Cardboard VR headset.


What makes a 3D photo pop in the 3D/VR app is the capability to
  • zoom in to magnify the photo
    • magnify to see detail
    • see background subject details you would otherwise miss
  • zoom out to shrink the photo
    • view the entire photo
    • zoom out to see foreground subjects comfortably, when a foreground subject is too close compared to the background
    • select a constant magnification level for you to view a sequence of photos comfortably
  • pan up/down, left/right to select window areas of interest in the photo. You can view selected areas of the photo that are out of view when you zoom in
You cannot do these things with yesterday's stereoscopes. View this web page in the app and see the photo above in 3D.

Check out the Mary Kate Fashion Photo Shoot (the stereoscope photo above) in 3D/VR with this app:

https://play.google.com/store/apps/details?id=com.andymodla.apps.a3dreelmarykatefashion

3D Fashion Shoot with Model Mary Kate

Mary Kate Fashion Shoot

You can view 3D photos I shot recently of model Mary Kate (above) with your Cardboard VR headset and phone, when you run my free Android app in Google Play Store:

https://play.google.com/store/apps/details?id=com.andymodla.apps.a3dreelmarykatefashion


Mary not only models but is also a high fashion stylist and makeup artist. I shot these fashion photos with my 3D twin camera rig at Fashmor Studio (Peter Italiano Photography) in Allentown, PA  on July 23rd. The studio strobes output is high power with short duration so I was able to capture Mary's dress twirl at 1/125, F11, ISO 200.
In the app click on screen or use a remote bluetooth controller Enter key to advance to the next photo. To see detail in the dress and look closer, press the volume up key on the phone or a bluetooth remote controller to enter Zoom mode. In Zoom mode you roll your Cardboard VR headset right to zoom in (magnify) and roll left to zoom out (shrink). Reposition to an area of interest by moving the headset up/down or left right. Press the volume up key again to save the zoom level and continue viewing photos at your preferred magnification level. Or stay in Zoom mode and advance to the next photo with the Enter key and reposition the photo as you like.
The photos are stored in the app as 4K (width x 2160h) images. With a high resolution phone like the Samsung Galaxy S6 or S7 you will be able to see dress detail up close.