Alter Ego Composite 3D Photos

Alter Ego Composite 3D Photo with model Heather

Alter Ego Composite 3D Photo with model Taquila

Captured 3D shots of models Heather and Taquila during the Spring Fling model/photographer meetup at the Fortress of the Arts in Philadelphia on May 5, 2013. I had a great time and enjoyed working with all the wonderful enthusiastic models.

I used twin Olympus E-PM2 cameras with Panasonic Lumix 14 mm lenses on a home made tripod mount and a single off camera flash, F8, 1/100 sec, ISO 200 or 400 (Taquila photo).

For post processing I usually create the left and right composite photos before converting to 3D using SPM (Stereo Photo Maker). This how the Taquila photos were processed.

However for Heather's photo, I first combined the left and right photos into side-by-side 3D photos with SPM and then formed the composite from the two stereo photos. Using a stereoscope to view the side-by-side images on the monitor screen in photoshop made it easier to correct some movement issues with the box in the photo. I think this is how I will make future composite 3D photos.


Google Chromecast Slideshow

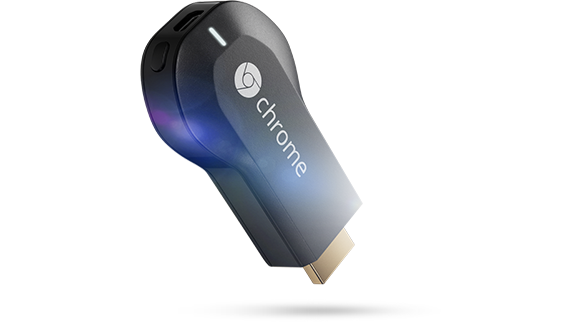
Chromecast adapter photo from Google web site
Updated 2013-8-9 adding 1080p information about Chromecast.

Got a Google Chromecast adapter last week with the idea of using it to show my 2D and 3D photos in a slideshow using a large monitor mounted on the wall. Since the Chromecast adapter is very small I can place it behind the mounted wall monitor without any wires showing (the power outlet is behind the monitor too). This setup allows me to display my photo slideshow from any networked source.

Chromecast was easy to setup and control with my Android phone. I used it to view Youtube videos from my iPad and also with a Chrome browser on a Windows 7 laptop. I found that if I moved to another local WIFI network at a friend's house, for example, I had to redo the setup since the adapter only remembers one network.

To present a slide show I downloaded the Chrome browser Google Cast extension to show the browser screen on the Chromecast receiver monitor/TV. For the slideshow I added the Chrome browser iSlide extension. I found that I could not use it directly to present a folder of photos on the laptop. The iSlide extension did not find the photo URLs from the directory list, since Chrome was using javascript to construct the image URLs.

What I ended up doing was to start a small web server that could construct the photo URLs in a web page. The web server is SimpleWebServer, a Java application that I downloaded from http://www.jibble.org/miniwebserver/ . It starts from the command line in my Windows 7 laptop in the top folder of the slides being presented:


To access the photo web page type in http://127.0.0.1 in a tab in your Chrome browser, and click on the folder drilling down to the listing of photos.


My photos are sized at 1920x1080 to exactly match the large 3D monitor or TV 1080p resolution. However my laptop screen resolution display is smaller than the photos, so I set the laptop screen  resolution to 1280x720 to keep the same aspect ratio of the photos. This allows me to use full screen (F11 hot key in Chrome) when presenting the photos. However the photos from ChromeCast on the large monitor are smaller resolution than their actual size because 1080p is not implemented from the Chrome browser.

Here are the iSlide options used:


I'm pleased that I could do a slideshow with Chromecast, but was not satisfied with the lower resolution  720p of the photos on the monitor. This appears to be an issue with the Google Cast extension options.

Here are the Google Cast options and note that the highest configurable resolution is 720p from the browser:


I was able to show a 1080p test pattern from Youtube using this video:
http://www.youtube.com/watch?v=Z4j5rJQMdOU
and it displayed at 1080p on my monitor using the Youtube Google cast button on the player. Because the video is coming directly from Youtube it can be 1080p. When a photo comes from the Chrome tab with the browser Google Cast extension on the laptop, its maximum resolution is 720p.

All told I am quite pleased with the ChromeCast adapter when used with a large screen TV or computer monitor. After playing with the ChromeCast for more that a week, my conclusion is that this little inexpensive adapter could be a replacement for a cable set-top box. Just need some additional software...

Glasses-Free 3D Tablet

Church door sculpture in Cologne Germany (3D anaglyph)

Updated 8/26/2013.

About a year and a half ago I posted my prediction that Apple might come out with a  glasses-free 3D iPad tablet. http://andymodlaphotography.blogspot.com/2012/01/new-apple-ipad-3-d.html  Didn't happen, wishful thinking. This is an innovation that should have happened by now.

Since then there were press reports that Amazon might produce a glasses-free 3D smart phone. Now I discovered a link to a Chinese manufacturer planning a glasses-free 3D Android tablet. http://pad.hampoo.com/En/Product/PlantIndex 

Based on the specifications, it has two cameras, but not mounted on the same side. They should have added a second 5M camera for a stereo pair.

After writing this post I discovered another glasses 3D tablet at http://www.neo3do.com/ The specifications show a lower screen resolution than the Hampoo tablet, but it can be purchased today.

What would I use this tablet for? It would be the best way to present my 3D stereo photo art, like my photo above.

I think I'll wait to see what new innovative features Apple has for their forthcoming iPad. Still hoping for a glasses-free 3D display. If this does not happen I'll consider an Android tablet for sure.

Reds Juke Joint


Last October I traveled with a tour group on a 5 day blues, rock, soul, and gospel musical adventure to Memphis, TN and Clarksdale, MS organized by radio station WXPN and the World Cafe in Philadelphia. Enjoyed this trip immensely. Got to hear great music and visit studios and venues most tourists don't get to see. On the tour, David Dye, host of the World Cafe, interviewed the artists that you can hear on a World Cafe broadcast.

The last venue we visited was Reds juke joint in Clarksdale MS. Here we listened to rockin blues music from Robert "Bilbo" Walker and his band. Soaked in red light, my photo above captures Reds atmosphere, with Walker on stage right. We were close up to the musicians for many performances, like this, making the experience extra special.

Listen to the music at http://mississippibluesproject.org/2012/11/30/watch-a-visit-to-reds-lounge-in-clarksdale-mississippi-featuring-red-paden-and-robert-bilbo-washington/#.UXsS5KJr0VD

3D Digital Photo Frame

3D Digital Photo Frame controller - pcDuino


I need a way to show my 3D photos to family and friends. Not finding any inexpensive large 3D digital photo frames available, besides a 3D TV, I decided to build my own photo frame and chose a 3D monitor that works with passive polarized glasses. Here's my DIY (do-it-yourself) 3D photo frame project.

Droste Effect in 3D

Droste Effect in 3D stereo

Here my model, Melissa posed with a picture frame to create a 3D Droste effect photo. This is my first attempt combining 3D with the Droste effect and the result worked out well. I used the Olympus E-PM2 kit lens 14-42mm on twin cameras on a tripod, with a single flash mounted on the rig, settings 14mm, F/8, 1/80 sec., ISO-200.

I shot this photo last weekend, Jan. 27th at the "Pajama Party" networking meet-up event for models and photographers at Katseye Studio in the Fortress of the Arts, Philadelphia. I wanted to try my new Olympus E-PM2 3D camera rig in a studio setting and was also able to use the studio strobe lighting with a PocketWizard wireless flash trigger from my 3D rig.

Here is another version of  Droste effect same left and right images as above:

Swirling Droste Effect in 3D Stereo


Composite 3D


I reworked this composite photo from the "Betty Davis Eyes, Film Noir" photographer-model meet-up shoot at Katseye Studio in the Fortress of the Arts, Philadelphia.  This photo was shot two years ago on October 10, 2010. At the meet-up we photographed models on several different studio sets.

For this shot I used twin Nikon D-80 cameras on a tripod with 18-55mm kit lenses to capture left and right images. I mounted the cameras horizontally on a home made support bar and triggered the shutters with a home made diode OR controller. The distance between the camera lenses is 170 mm.

At the time I found the controller worked OK in natural light for still subjects, but had a problem with studio lights because the shutters do not trigger at exactly the same time. The result was that one image was frequently under exposed slightly when shot with flash. Only recently did I solve this problem with a modified Camera Axe 3 controller that I reported on previously.

This photo is a composite from two images combined with Photoshop Elements 9 and then merged the left image and right image with StereoPhotoMaker to create the stereo image.

D-80 camera settings were 1/30 sec, F8, ISO 400, 26 mm focal length. Natural light.

3D Rig Using Twin Olympus E-PM2 Cameras

Cat jump in 3D stereo

(this post last edited Jan 26, 2013) 

Photo of my cat jumping from the top of a refrigerator to the counter, taken with my twin camera stereo rig. To view side-by-side photos on screen I use a stereoscope purchased from Berezin Stereo Photography Products.


I made this twin Olympus E-PM2 camera rig for 3D photography. It's my third homemade rig, the first used twin Canon point and shoot SD800 cameras, and the second,  twin Nikon D80 cameras. For this rig I chose the Olympus E-PM2 camera because I wanted a small lighter weight camera with good image quality.  My goal was a camera system that could be used for action shots. The SD800 was not good for action and the Nikon D80s are too heavy to hold and very difficult to adjust on the run. The twin D80s required a tripod to use effectively.  I also have a 3D FujiFilm W3, but it is not suited for action shots and the image quality is not great.

For camera and flash synchronization I modified a Camera Axe 3 controller, which I built from a kit (Camera Axe) about 3 years ago. This Arduino based computer controller has 3 unused I/O port lines, allowing me to use two input lines for focus and shutter release switches and one output line for triggering a flash. An opto-isolator was wired into the output line for the flash, and the two inputs were wired directly to focus and shutter release switches. I modified the code for the controller to detect the focus and shutter release, trigger the cameras simultaneously and fire the flash after detecting when the flash from the last camera fired. Two standard input sensors on the CameraAxe 3 detect the camera flash firing, and the two output lines control each camera's focus and shutter trigger lines.

The harness was built on a 12 inch long, 1/4-20 inch diameter screw shaft mounted in a large red sanding handle. The left camera is mounted upside down to get the smallest distance possible between the lenses, about 110 mm.  This is wider than the W3 at 75 mm, human eyes at 65 mm, and smaller than the twin D80 mount at 170 mm. (The D80s had to be mounted right-side up for the shortest distance between the lenses.) I made two support bars to hold the E-PM2 cameras and fastened with 1/4-20 inch nuts to the long screw.

The LumoPro LP160  quad sync flash mounts on an umbrella swivel. I use a LumiQuest Softbox III for softer light diffusion. The flash is manually set for zoom and light level output. This flash system is a big improvement over the built-in flash in the FujiFilm W3.

The whole rig can be placed on a monopole making it easier to carry and use. Without the monopole the rig + flash weighs about 5 lbs (2.3 kg). This is heavy to hold in one hand.

I think the Olympus E-PM2 is the easiest camera to use in twin mode for 3D than the other home-made camera rigs I built.  I am able to set the focus point for my subject in each camera by touching the same point on the LED display for the E-PM2 cameras. With the D80 I had to look through the viewfinder of each camera, focus, and then change to manual mode to keep the focus. When I press the shutter release button half way to set the camera focus, both E-PM2 cameras focus on the prior selected subject point. Also the E-PM2 has an option to show the live display upside down when the camera is upside down in its harness. This makes it easy to compose the shot. A disadvantage of the E-PM2 is that the menu system keeps its orientation when the camera is upside down, while the view looks right side up. This makes it harder to change parameters for the shot.

The camera flash sync time difference is in a range of .4 to 6 ms.,  most often around 1.5 ms. The controller calculates this time and displays it after taking a photo and shows which camera triggered first. When my shutter speed is set at 200 one camera may be too late for the flash, while at 100, I get better results more often, despite delays between camera shutter openings.

My LumoPro LP160 flash has a flash duration of 1/450 sec at full power and 1/2250 sec at quarter power. See LumoPro web site. Since the shutter openings are not in sync, the flash time will determine how well I capture moving objects. Here is an informative web page on this topic.

My controller triggers the cameras at the same time without accounting for each camera's shutter delay. This is not predictable, but I suppose I could add code to delay the first by an average sync delay time to improve the system on average based on which camera is faster.

The controller bases the flash trigger on the camera flash sync settings for either 1st or 2nd curtain. With both cameras at first curtain, the controller waits for the latest flash signal from either camera before triggering the flash. With both cameras at 2nd curtain flash sync, the controller fires the flash when either camera flash  triggers first.

Here is a video showing the rig in 360:


Leaping Cat